When it comes to displaying data in React, tables are one of the most common elements you’ll need to style and design. But let’s be honest—default tables are pretty plain and uninspiring. To elevate your web app’s user interface, you can rebuild the basic React table into something visually appealing, interactive, and functional.
In this guide, we’ll go over practical design ideas and styling tips to transform your basic table into a modern, sleek component.
1. Start with the Structure: A Simple React Table
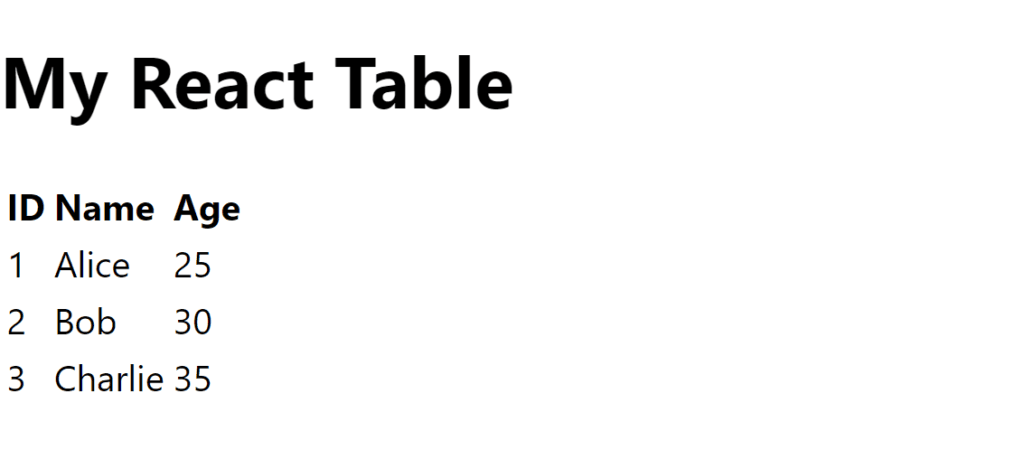
First, let’s set up the foundation. Here’s a simple, unstyled React table:

function BasicTable() {
  const data = [
    { id: 1, name: 'Alice', age: 25 },
    { id: 2, name: 'Bob', age: 30 },
    { id: 3, name: 'Charlie', age: 35 }
  ];

  return (
    <table>
      <thead>
        <tr>
          <th>ID</th>
          <th>Name</th>
          <th>Age</th>
        </tr>
      </thead>
      <tbody>
        {data.map((row) => (
          <tr key={row.id}>
            <td>{row.id}</td>
            <td>{row.name}</td>
            <td>{row.age}</td>
          </tr>
        ))}
      </tbody>
    </table>
  );
}
This gives you a basic table with rows of data, but it lacks style and structure. Now, let’s rebuild the table style from the ground up.
2. Add Simple CSS for Better Readability
To start, you can improve the readability of your table by adding basic CSS. Here’s how you can add some initial styling:

table {
  width: 100%;
  border-collapse: collapse;
}

th, td {
  border: 1px solid #ddd;
  padding: 8px;
  text-align: left;
  border-bottom: 1px solid #ccc;

}

th {
  background-color: #6a5acd;
  font-weight: bold;
  color: #f1f1f1;
}
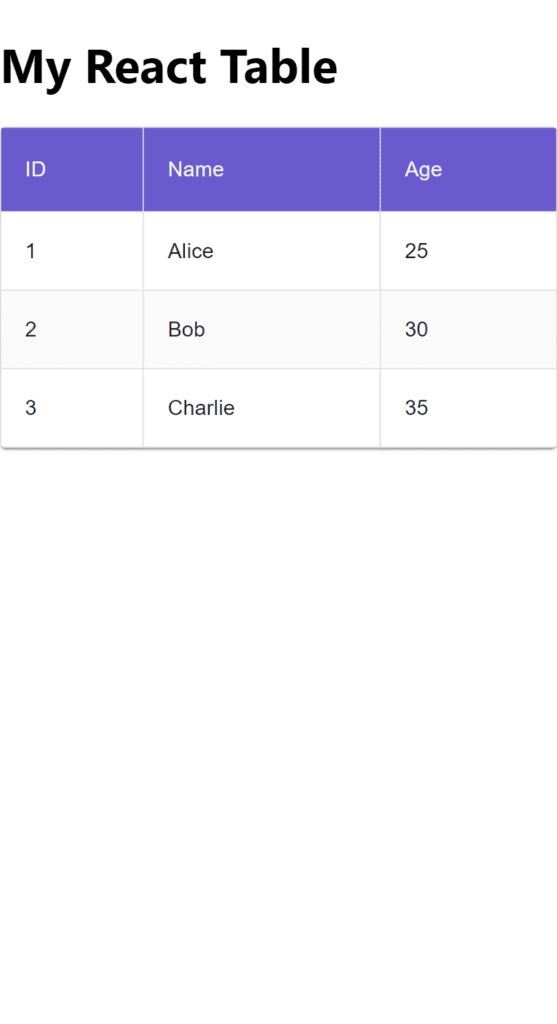
By adding this CSS, we ensure that the table is readable and organized. Borders are added to define each cell, and the header row stands out with a different background color.
3. Elevate the Design with Hover Effects and Borders
Next, let’s add hover effects and borders to give the table a more interactive feel. These subtle changes can make a big difference in user experience:

tr:hover {
  background-color: #f1f1f1;
}

tbody tr:nth-child(even) {
  background-color: #fafafa;
}
These styles make the table feel more dynamic. When users hover over a row, the background color changes, helping them focus on specific data. The alternating row colors also improve readability.
4. Add Custom Styling for Responsive Tables
A common challenge with tables is making them responsive. Basic tables can look squished or overflow on smaller screens. To rebuild your table for mobile devices, you can use CSS media queries:
@media (max-width: 768px) {
  table {
    display: block;
    overflow-x: auto;
    white-space: nowrap;
  }

  thead {
    display: none;
  }

  tr {
    display: block;
    margin-bottom: 1rem;
  }

  td {
    display: block;
    text-align: right;
    padding-left: 50%;
    position: relative;
  }

  td:before {
    content: attr(data-label);
    position: absolute;
    left: 10px;
    white-space: nowrap;
    font-weight: bold;
  }
}
In this example, the table becomes scrollable on smaller screens, and the table headers are hidden. Instead, each cell shows the corresponding column name using data-label, keeping the table layout responsive without sacrificing content clarity.
You can also check out our blog on 10+ modern login page designs with code for inspiration on how to keep your UI clean and effective.
5. Add Interactive Sorting and Filtering
An attractive React table is not just about looks—it’s also about functionality. Adding features like sorting and filtering can significantly improve the user experience. Using a library like react-table makes it easy to implement these features.
Here’s a basic implementation of a sortable table using react-table:
npm install react-tableAnd here’s the React code:
import React from 'react';
import { useTable, useSortBy } from 'react-table';

function SortableTable({ columns, data }) {
  const { getTableProps, getTableBodyProps, headerGroups, rows, prepareRow } = useTable({ columns, data }, useSortBy);

  return (
    <table {...getTableProps()}>
      <thead>
        {headerGroups.map(headerGroup => (
          <tr {...headerGroup.getHeaderGroupProps()}>
            {headerGroup.headers.map(column => (
              <th {...column.getHeaderProps(column.getSortByToggleProps())}>
                {column.render('Header')}
                <span>
                  {column.isSorted ? (column.isSortedDesc ? ' 🔽' : ' 🔼') : ''}
                </span>
              </th>
            ))}
          </tr>
        ))}
      </thead>
      <tbody {...getTableBodyProps()}>
        {rows.map(row => {
          prepareRow(row);
          return (
            <tr {...row.getRowProps()}>
              {row.cells.map(cell => {
                return <td {...cell.getCellProps()}>{cell.render('Cell')}</td>;
              })}
            </tr>
          );
        })}
      </tbody>
    </table>
  );
}
In this example, users can click on column headers to sort the data. This small, interactive feature makes your table much more dynamic and functional.
6. Customize with Themes and Modern UI Libraries
If you want to quickly apply professional-looking designs to your tables, consider using modern UI libraries like Material-UI or Chakra UI. These libraries offer pre-built table components with sleek designs, responsive layouts, and extensive customization options.
Here’s an example using Material-UI’s table component:
npm install @mui/material @emotion/react @emotion/styled
And the code:
import * as React from 'react';
import { Table, TableBody, TableCell, TableContainer, TableHead, TableRow, Paper } from '@mui/material';

function MuiTable() {
  const data = [
    { id: 1, name: 'Alice', age: 25 },
    { id: 2, name: 'Bob', age: 30 },
    { id: 3, name: 'Charlie', age: 35 }
  ];

  return (
    <TableContainer component={Paper}>
      <Table>
        <TableHead>
          <TableRow>
            <TableCell>ID</TableCell>
            <TableCell>Name</TableCell>
            <TableCell>Age</TableCell>
          </TableRow>
        </TableHead>
        <TableBody>
          {data.map((row) => (
            <TableRow key={row.id}>
              <TableCell>{row.id}</TableCell>
              <TableCell>{row.name}</TableCell>
              <TableCell>{row.age}</TableCell>
            </TableRow>
          ))}
        </TableBody>
      </Table>
    </TableContainer>
  );
}
Material-UI tables provide out-of-the-box features like pagination, sorting, and theme integration, making your tables look polished with minimal effort.
Final Thoughts on React Table Style
Designing and styling react table: it’s more than just rows and columns. When imbued with a little creativity and attention to detail, your basic table can easily be turned into something modern, responsive, and extremely functional. Whether you need to add hover effects, mobile responsive styles, sorting, or filtering features, all these design decisions add up to a better user experience.
Well, next time you create a table in React, don’t do the same thing as everyone else. Make it look pretty and be interactive as well. You’ll have a blast building those smooth, slick data tables, following these ideas for React table designs. To get more grip on React you can give a React quiz and go through React interview questions, which helps in understanding core concepts.


